How to Repair a Ryobi Battery That Will not Charge?

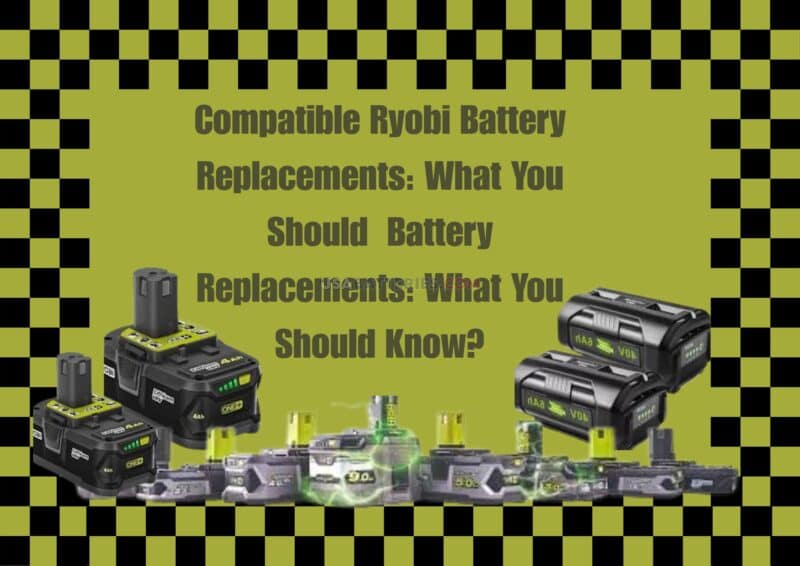
I’ve been using cordless tools for years, and one thing is clear — they’ve made life a lot easier. The newer lithium-ion batteries, especially the Ryobi Battery 40V range, give lighter tools, more power, and longer run times compared to the old heavy packs we all remember. These days, corded tools are hardly ever taken out of storage.
However, even the best Ryobi batteries have their weaknesses. After a while, some stop charging, some only flash red on the charger, and others show no sign of life at all. It always seems to happen right in the middle of a job, which can be frustrating.
Here’s the good news: most “dead” batteries aren’t really dead. Often, all they need is a reset or a small boost to bring them back to life. With just a few simple tools, you can get them running again and save yourself the cost of a replacement.
In this guide, you’ll learn why these batteries fail, what the warning lights mean, and step-by-step methods to revive them safely and effectively.
Ryobi 40V Battery – 6.0Ah Replacement, Quality You Can Count On
Step-by-Step Guide to Fix Your Ryobi Battery.
I have used these steps myself and passed the recipe on to others as well. It has done wonders for the battery, which was almost at its end.
Step 1: Get Your Tools Ready:
- An AC adapter (18V–20V DC)
- Wire stripper or knife
- Multimeter (to check voltage)
- Screwdriver
- Optional: alligator clips and insulated gloves
Step 2: Prepare the Adapter:
- Cross-check if the adaptor is working or dead.
- Identify the positive (+) and negative (-) wires.
Step 3: Strip the Wires:
- Strip about ½ inch of insulation from both wires.
- Twist the wires neatly so they’re ready for connection.
Step 4: Open the Battery Case:
- Remove the battery from the tool.
- Carefully unscrew the case.
- Keep the screw case aside safely.
Step 5: Take Out the Battery Pack:
- Gently lift the battery pack
- Choose a dry surface to place it on.
Step 6: Check for Damage:
- Look for signs like:
- Burn marks
- Bulging or leaking cells
- Loose wires or corrosion
- Stop if the battery looks damaged — it’s unsafe to fix.
Step 7: Set Up the Multimeter:
- Turn it into a DC voltage (20V or more).
- Black probe → Negative (-)
- Red probe → Positive (+)
Step 8: Test the Voltage:
- Healthy battery: 18–20V
- Too low: Below 14V — needs boosting.
Step 9: Double-Check Polarity:
- Red wire → Positive (+) terminal
- Black wire → Negative (-) terminal
- Wrong polarity = serious damage.
Step 10: Boost the Battery:
- Connect wires to the battery terminals.
- Plug in the adapter for 5–10 minutes.
- Notice an odd smell or overheating.
Step 11: Test Again:
- Disconnect the adapter.
- Check the voltage again with the multimeter.
- Above 14V = good.
- Below 14V = battery may be too weak to save.
Step 12: Reassemble the Battery:
- Put the battery pack back in the case.
- Screw it closed tightly.
Step 13: Recharge and Test:
- Place it in the charger for a full charge (30–60 minutes).
- Test it in your tool.
- If it drains fast or overheats, it’s time to replace it.
Trusted Ryobi 40V Battery – 6.0Ah Replacement for Longer Runtime
⚠️ DISCLAIMER: “ This guide is only for educational purposes, and any work on electrical circuits can cause injury and damage if it is not handled properly. Before attempting any repairs, always remember to disconnect the power. Proceed at your own risk. Any injuries, damages, and accidents that may arise in any manner are not the liability of the author or the website. If you lack the necessary experience, do not hesitate to ask for assistance from a professional. ”
RYOBI BATTERY 40V REPAIR GUIDE:
Before doing anything else with a battery, it’s essential to put on protective gear, including goggles and gloves. After a thorough examination, it would most likely be established that a multimeter does a wonderful job of determining the overall condition of a battery.
I check if my power tool batteries are fully charged, measure a voltage of 36-40V, and what I noticed is that undercharged batteries measure a voltage of 28-35V, and anything lower than that would be classified as a deeply discharged battery.
These alluded to batteries are fixed with the use of a 40V booster, which I am super careful to connect positive to positive and negative to negative. I monitor the voltage level closely, and I’m careful to stay under the 5–10-minute and pulse burst time intervals since those intervals are optimal for avoiding stress on the cells.
I use a standard charger to recharge the battery, and after that, I test it on another device to ensure that the voltage is steady. If the battery is defective and swollen, I don’t take risks, and I would recommend replacement.
Quick Safety Tips:
- Wear gloves and safety glasses.
- Work in a dry, safe space.
- Never leave the battery unattended while boosting.
- Store batteries in a cool, dry place when not in use.
Voltage Diagnosis & Range Guide.
Ryobi Battery Type | Nominal Voltage | Voltage Range & Diagnosis | Typical Uses | Popular Capacities | Next Step |
Ryobi ONE+ Lithium-Ion | 18V | 18–20V – Healthy 14–17V – Weak but recoverable Below 14V – Deeply discharged Drops quickly after boosting – Bad cells |
DIY tools, drills, impact drivers, saws, and over 300+ tools | Compact: 1.5Ah–2.0Ah Standard: 4.0Ah–6.0Ah High-Performance: 6.0Ah–9.0Ah |
Healthy: Ready to use Weak: Boost battery Deeply Discharged: Boost or pulse charge. Bad Cells: Replace battery |
Ryobi 40V Lithium-Ion | 40V | 36–40V – Healthy 28–35V – Weak but recoverable Below 28V – Deeply discharged Drops quickly after boosting – Bad cells |
Outdoor tools like lawn mowers, blowers, and trimmers | 2.0Ah, 4.0Ah, 6.0Ah | Healthy: Use as normal Weak: Boost voltage Deep: Boost or pulse charge Bad Cells: Replace battery |
Ryobi USB Lithium | 4V | 3.8–4.2V – Healthy 3.5–3.7V – Weak Below 3.5V – Deep discharge |
Small cordless tools, screwdrivers, and precision cutters | Rechargeable via USB, fixed small cell | Healthy: Use normally Weak: Recharge fully Deep: Replace if it won’t hold a charge |
Ryobi 80V (Pro Range) | 80V | 78–82V – Healthy 70–77V – Weak Below 70V – Deep discharge |
Professional outdoor equipment, heavy-duty tools | Varies by tool (4.0Ah, 6.0Ah, 10.0Ah packs) | Healthy: Ready to use Weak: Boost voltage Deep: Pulse charge carefully Bad Cells: Replace |
Troubleshooting Tips for Batteries.
Even after following the boost steps, when my Ryobi batteries act up stubbornly, I move to dig in more with these troubleshooting steps.
1. Check the Basics:
- Inspect the charger: Ensure it works with another battery.
- Clean the terminals: Use a dry cloth or cotton swab with rubbing alcohol to remove dirt or corrosion.
- Try a different outlet: Sometimes it’s just a simple power issue.
2. Look for Signs of Permanent Damage:
At times when my Battery had become completely worn out, these were the major signs.
- Burn marks or melted casing
- Swollen or leaking cells
- Strong chemical smell
3. Try the Pulse Charging Technique:
For me, this method helps “wake up” deeply discharged cells if the basic boost didn’t work.
- Use a charger or power supply that can pulse charge (send short, quick bursts of current).
- For safety, keep the voltage at or just below 20V.
- When I pulse for 5–10 seconds, then let the battery rest for 30 seconds.
- Checking the voltage after every round. Repeat 5–10 times.
⚠️ Note: This works best for the batteries, which are just deeply discharged, not for those with damaged or swollen cells.
4. Test the Battery Again:
- Used my multimeter to test whether the battery voltage has risen above 14V.
- Try charging it normally. If it holds steady after resting for 5–10 minutes.
- The battery cells can’t hold a charge; it’s time for a replacement. If it drops rapidly below 12V.
5. Prevent Future Issues:
- I avoid leaving batteries on the charger for more than needed.
- Prioritized storing them in a cool, dry place (not in direct sunlight or damp areas).
- Always used my tools regularly — idle batteries degrade faster.
- Charge batteries before they drop below 20% to prolong their lifespan.
6. Avail trusted brand support:
- I chose a brand where I got my repair queries sorted quickly than expected.
- Brands like USA Batteries made my experience of customer queries smoother.
- Standard aftermarket names provide the best-suited resolution for the battery problem.
Reliable Ryobi 40V Battery – 6.0Ah Replacement, Great Price
Troubleshooting Quick Reference:
Problem | Possible Cause | Solution |
Battery not detected by charger | Voltage too low | Boost or pulse charge |
Charger light flashing red | Overheated battery or loose connection | Let the battery cool, check terminals |
The battery overheats while boosting | Damaged or shorted cells | Stop immediately, replace the battery |
Voltage drops after boost | Bad internal cells | Replace battery |
OEM AND AFTERMARKET RYOBI BATTERY.
I have had experience with both OEM and aftermarket ones:
OEM Batteries:
- Reliable, perfectly compatible, and covered by Ryobi’s warranty.
- Deliver consistent performance and longer lifespan.
- More expensive than the aftermarket ones.
Aftermarket Batteries:
- More affordable.
- For reliability, USA Batteries is a trusted brand offering high-quality, Ryobi-compatible batteries with warranty support.
- Provides high-capacity batteries.
FAQS.
1. Why isn’t my Ryobi battery charging?
It’s likely to be because it is discharged deeply, overheated, or has poor charger contact.
2. Can a dead Ryobi be fixed?
If the cells aren’t permanently damaged. Then yes!
3. How do I know if it’s beyond repair?
It needs replacing when no voltage after boosting or a rapid voltage drop
4. Is boosting safe?
Using proper tools and taking safety precautions makes it safe.
5. What tools do I need?
Multimeter, AC adapter (18–20V), screwdriver, and wire strippers.
6. How long does the fix take?
15–30 minutes.
7. Can this method work on other brands?
For most lithium-ion batteries with similar voltage, this method can be applied.
IN A NUTSHELL.
In my opinion, reviving a dead Ryobi battery can be accomplished more easily than people think, provided they have the necessary tools. I have personally revived quite a few by checking the voltage and boosting power. That said, not all batteries can be rescued. A battery pack that can no longer hold a charge, or is swollen or leaking, I do not take chances, and I replace it. That is, it is wiser to follow safe procedural steps and secure a dependable replacement when necessary.
You can rely on USA Batteries for reasonably priced Ryobi-compatible alternatives. These batteries have remarkable performance and longevity and work effortlessly with Ryobi tools.